
Prerequisites
In this article, we assume that you are familiar with the Eclipse development environment and you’ve already have a Jazz server and a RTC client properly configured for plugins development. If you have not, please refer to the wiki on Jazz.net https://jazz.net/wiki/bin/view/Main/AppSdkSetup
Workitem Automation
Let’s assume we want to extend an existing Change Request workflow to create new tasks upon the Change Request workflow state transition. We’ll show only how to register the event upon saving the workitem state. One could then create blocking or dependent workitems, prevent some states from triggering and so on.
Plug-in Creation
To extend Rational Team Concert you need to create a plugin. Then you’ll need to install the plugin on the server and if you want to use the rich client IDE, you’ll have to install the eclipse plugin directly into the client as well.
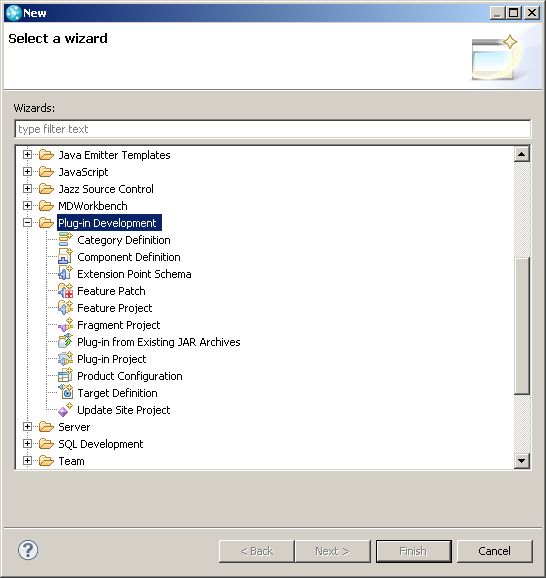
1 - First step is to create a Plug-in project:
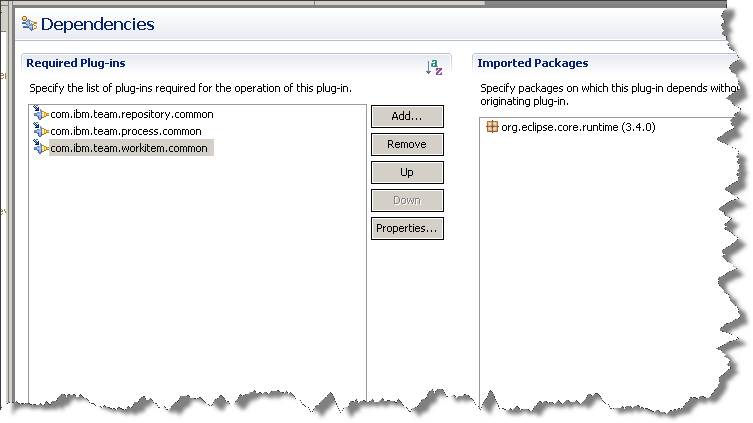
2 - Add Dependencies:
Then go to the Dependencies tab to add the plugins your extension will depend on such as:
- com.ibm.team.repository.common
- com.ibm.team.process.common
- com.ibm.team.workitem.common
The most frequently used plugins usually are:
- com.ibm.team.process.service
- com.ibm.team.workitem.common
- com.ibm.team. workitem.service
- com.ibm.team.process.common
- com.ibm.team.repository.common
- com.ibm.team.repository.service
Also import the package org.eclipse.core.runtime. Then save the project to refresh the workspace.
3 - Add Extension Point
Extension points are entry points. In Rational Team Concert, these entry points are predefined by its API. Most of Rational Team Concert customizations deal with the save workitem event. For this event there are basically two types of plugins: Advisors and Participants. Advisors are the preconditions and the Participants are known as follow-up actions. It is a good practice to consider that if a plugin will change the state of a workitem, it must be a participant. Advisors should not change the data, they only validate it.
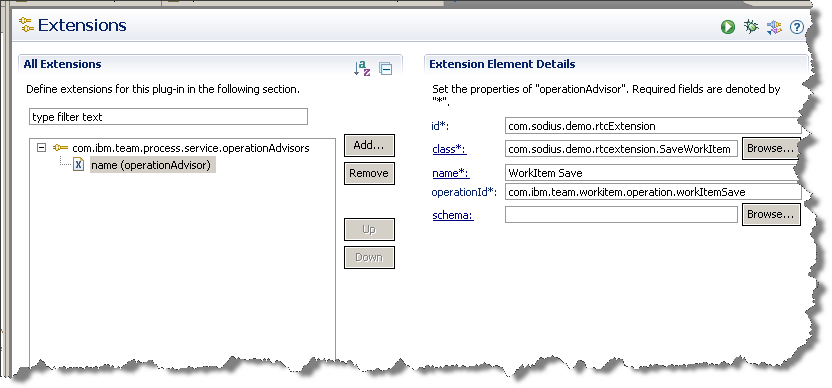
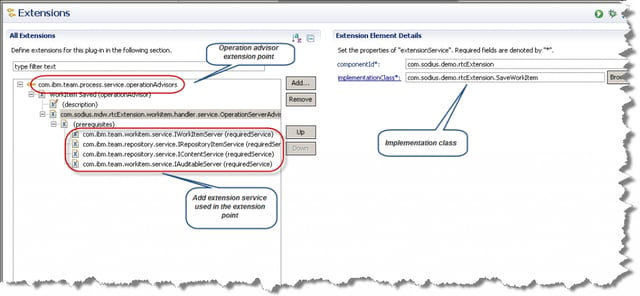
Let's select the Extensions tab and add your Extension Point for this plugin. Since this is a pre-condition and we will not change the state of the workitem, let's use an Operation Advisor. We want to define a pre-condition to check the state of the workitem to perform some automation. The extension point needed is called an operationAdvisor, look for: com.ibm.team.proccess.service.operationAdvisors. This option only appears if you have correctly added the required plugins as mentioned earlier.

4 - Populate the fields
Fill the following fields:
- id: Identifier of the advisor
- class: Java class that will be called by the advisor
- name: Name by which the advisor will be identified in the process settings.
- operationId: Id of the operation where the advisor will be injected. For this example we use com.ibm.team.workitem.operation.workItemSave
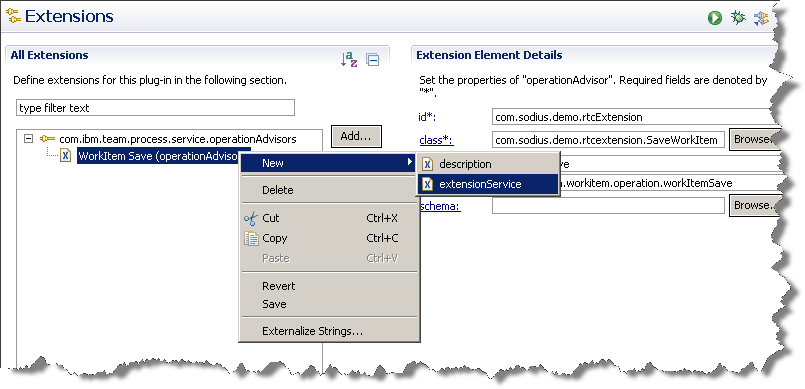
5 - Add an extension service
Right click, New -> extensionService and fill an id and use the same class used in the extension point.
Enter an id and use the same class used in the extension point

6 - Operation Advisor Class implementation
Implement the operation advisor class. Click implementationClass to create the class, it extends AbstractService and implements IOperationAdvisor
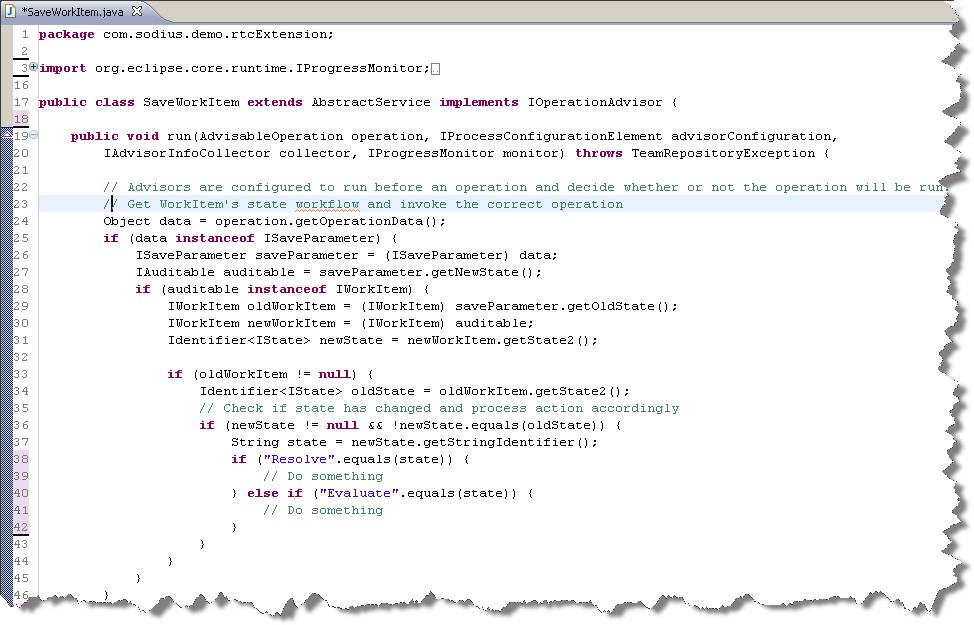 In this example we simply check if the workflow new state is “Resolve” or “Evaluate” to perform some automation like creating depending workitems or blocking workitems prior saving the workitem state. This is out-of-scope for this article.
Once you’ve implemented your logic you’ll need to create the feature, the update site and upload your plugin to the server.
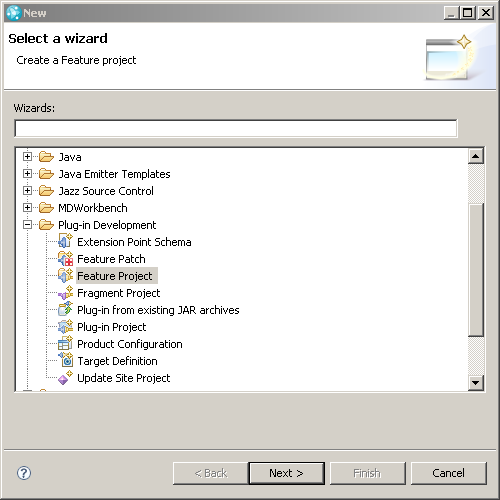
7 - Create a new Feature Project
Then in the Plug-ins tab, add your plugins.
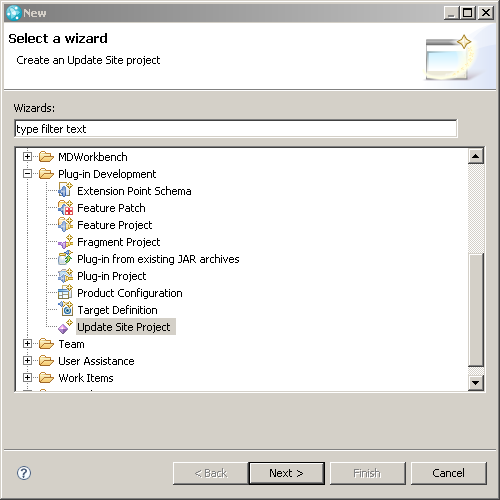
8 - Create a new Update Site Project
You may create the site in the server folder to facilitate development. The recommended folder is serverconfccmsitesYOUR_SITE_FOLDER. Then add your feature to the created update site.
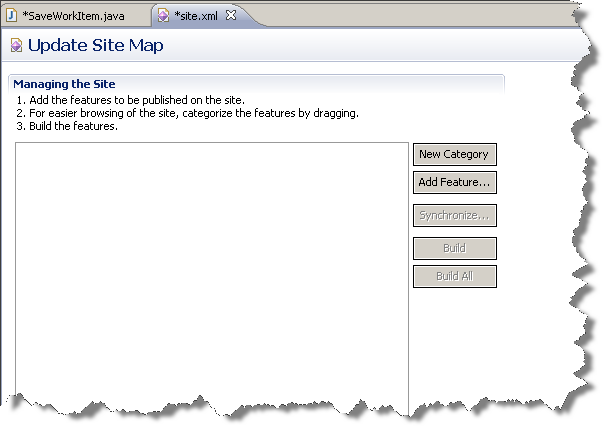
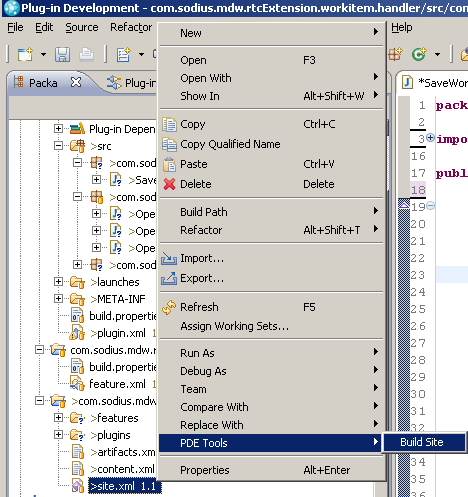
Then to build your site, right click on site.xml file, and select PDE Tools -> Build Site
9 - Create a provisioning file
Before starting the server, we must create a provision file for our site to load our plugin. This file should be created in the serverconfccmprovision_profiles.
Create a text file with the following content and name it YOUR_NAME.ini
url=file:ccm/sites/YOUR_PLUGIN_NAME
featureid=YOUR_PLUGIN_FEATURE_feature
10 - Reset the server
It is always recommended to reset the server to empty the cache and force the server to reload your plugins.
To reset the server call this URL https://<yourserver>:<port>/jts/admin/cmd/requestReset
Once the server has been reset, you can restart it. It will load your plugins defined by the features in the provisioning file you created earlier.
11 - Enable the Advisor
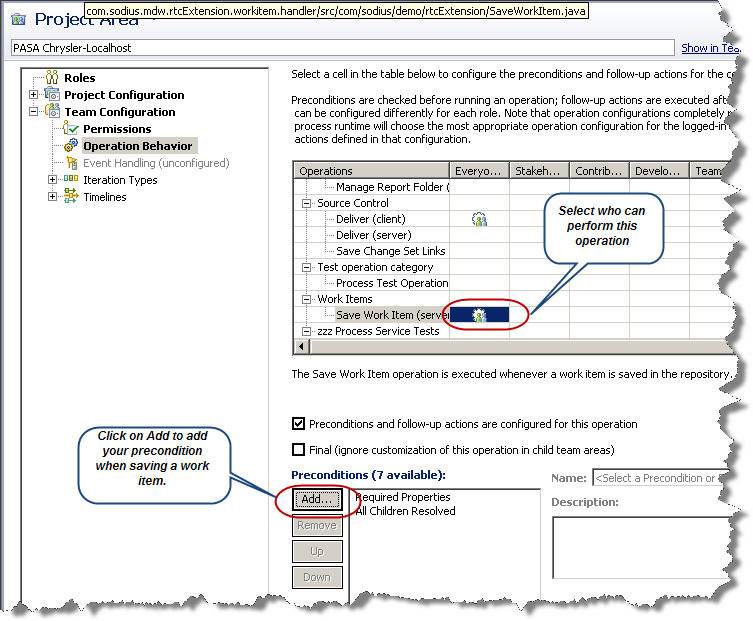
The last step left is to enable your advisor in your project template.
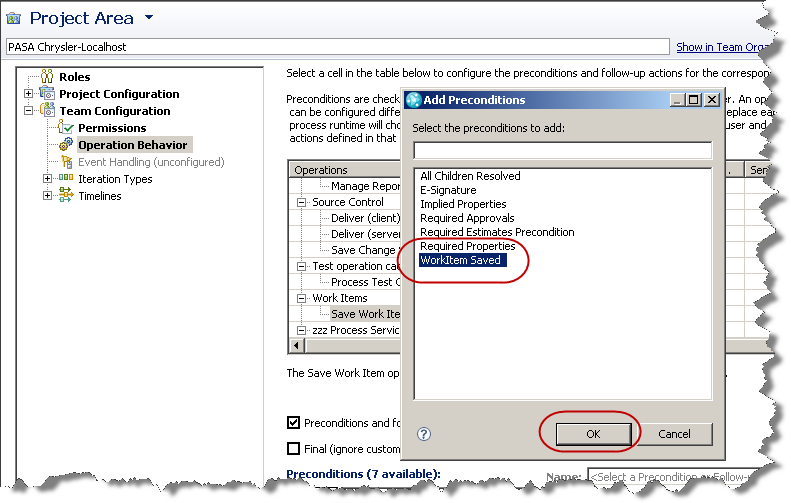
Open the project area and select Process Configuration. Go to TeamConfiguration->Operation Behavior and look for Work Items -> Save Work Item (server) and click Add to add your Advisor.
Congratulation! You’re all done. When you run your plugin, prior to saving a workitem your class SaveWorkItem will be invoked.


Leave us your comment